10 Ways to Improve Drone Durability
Drones are by no means cheap, and this is already within the perspective of affordable ones. As such, knowing how to ensure that your investment is protected should be one of your priorities. Here are 9 tips to help you improve drone durability and minimize damages in crashes.

Choose the Right Frame
The frame serves as the base structure of your drone, carrying nearly everything necessary within your drone, from its propellers to the more sensitive chips and transmitters positioned inside.
The frame is the component that usually takes the brunt of the force in a crash. Hence, having a high quality frame is important to protect your drone. If you are an avid FPV racer, opting for lightweight ones is perhaps a mainstream option, but it might be a little too fragile for most situations.
To ensure that your frame is strong enough to withstand the impact without easily breaking, you need at least 4 – 5 mm thick arms. It does gain a bit of weight, but that’s the trade off that you need to accept if you want the frame to be stronger.

Some of the frames have special designs that add extra protection to drone components. For instance, the XILO Phreakstyle frame has protruded camera plates to protect the camera from front collisions. It also has motor guards to prevent the motors from being hit directly in a crash. While I believe one day such designs will become an industry standard, do look out for those features when you are choosing your frame.
Protect the Wiring and ESC
When the props sustain damage due to the impact from collision, they might bend. And when that happens, the prop can cut your wiring or ESC (if you are using individual ESC) on the arm and cause damage to them.
To reduce the risk of that, you will need to have some protective measures. The easiest way to do that is by adding a protective barrier or a covering specially made for your wires and/or ESC.
Before you try to complain about the additional cost that this may incur, you should probably know that you could use anything (and by that, I mean anything) solid to cover it up, sealed tightly even with just an electrical tape. From spare propeller blades to 3D-printed protective pieces, your imagination is the limit when it comes to the addition of such protective measures.
I’ve also seen people mounting their individual ESC at the underside of the arms, or running the wires from the underneath. That helps as well. But, you will still need to cover the ESC with something to protect it from the impact when you land.
Reinforce the Antenna

The problem with antennas is that it poses a dilemma: you need to expose them for proper reception, but too much exposure could increase the risk of it breaking in crashes.
An antenna can be divided into 3 sections: the active element, coaxial cable and connector. In a crash, the impact causes the antenna to bend, and the bending point suffers the most pressure. You want the bending to happen on the cable because the cable is flexible. If the bending happens too near to the connector, the connector may break.
To prevent the connector from taking too much pressure, you can secure the connector side of the cable to your frame using a heatshrink or tape. By doing so, in the event when the antenna bends, the bending is restricted at the cable, which is the flexible portion.
With that, you can leave the active element or lobe exposed outside the frame for better reception.
Aside from the connector, the antenna lobe which contains the active element can break after repeated impact. To protect it, you can cover the lobe with 2 or 3 layers of heatshrink. That would reduce the impact to the lobe in a collision. Even if the lobe breaks, the heatshrink will hold it together and continue to protect the encased active element.
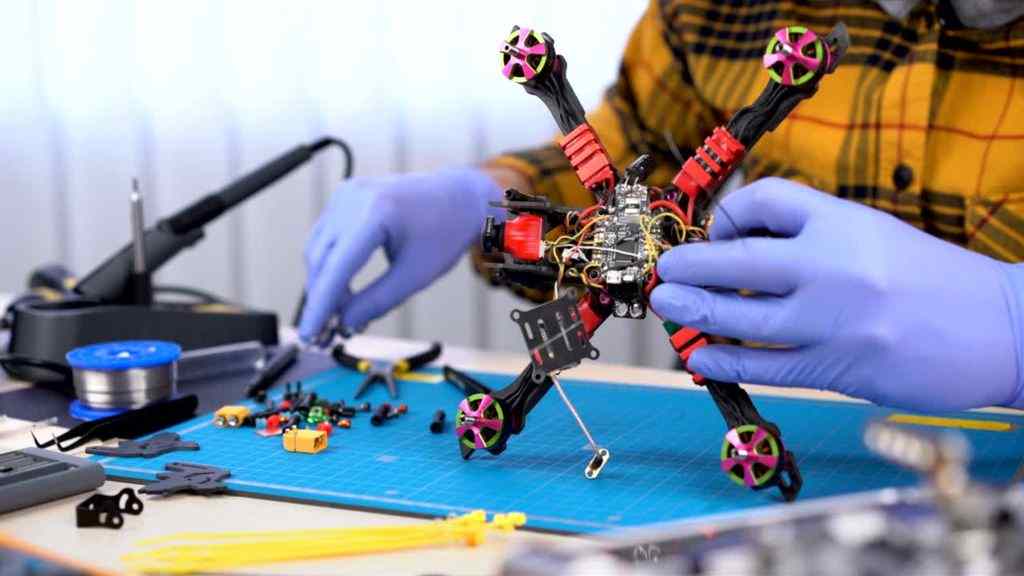
Use the Right Standoff/Spacer
Standoffs are separators with threads that secure your ESC and FC, while allowing some space between them so that the chips don’t touch each other.
To maintain a lightweight build, most pilots would opt for standoffs that are entirely made out of nylon. However, that compromises the strength of your entire stack due to the innate fragility of the nylon standoffs. In a crash, the nylon standoffs will just give way, ejecting and damaging the ESC or FC.
To prevent this, use either metal standoffs, or use long bolts with spacers to secure the ESC/FC stack.
Spacers are basically tubes that separate 2 components, much like standoffs, except the spacers don’t have threads. Use a long bolt to secure your ESC and FC, with a spacer in between. That will give you better protection to your stack.
Soft Mounting
Soft mounting was initially used for FC to minimize the amount of vibration that is messing up the gyro system. By soft mounting the FC, you can get a smoother flight experience.
However, soft mounting can also protect your FC and ESC from impact. During a crash, the chips can move, but they are held in place by the standoff/bolt. So, the force from the impact is exerted onto the chip itself. Soft mounting gummies or grommets between the chips and the standoffs/bolt can help to reduce such impact.
While I am not sure how significant is soft mounting on protecting the chips, I guess it has slowly become an industry standard to include grommets for FC and 4 in 1 ESC. If you are buying a new ESC/FC, just make sure it comes with soft mounting grommets.
Adding Bumpers

This is pretty much forgotten in most guides, as the usual concept is that the frame is the one that should always take the brunt of the force. You can take it one step further with the help of bumpers to protect your frame.
There are a lot of 3D printed bumpers available online. They are usually meant for the tip of the arms, which is the portion that is most susceptible to damage.
The tip of the arms chips off with each crash. Sooner or later, you will need to replace the chipped arm. Otherwise, the motor will be exposed, and the chance of hitting the motor in a crash becomes higher.
By adding a little protection for the arms of your frame, the longevity of your frame is further increased. That can save you some money in the long run, since you have minimized the need for replacing the arms.
Adding Prop Guards, or Use Whoops
Prop guards are basically plastics that surround your props so that your props don’t cut into someone or something. It is usually used indoors and for whoops.
You might think that having prop guards on your drone makes you look like a noob. And toothpicks look cooler than whoops. But hey, it does protect your props and motors in a crash by absorbing some of the impact from collision!
Putting on Landing Pad

To minimize the impact or reduce scratches on your frame caused by landings, you can add some paddings at the underside of the frame. The paddings usually come in the form of foam or sponge. Not only does it prevent scratching, but it also absorbs the impact from harsh landing.
While the landing pads are relatively fragile, they hold up pretty well in protecting the drone from a few harsh landing. Sure, it might be troublesome due to the need for frequent replacement, but then again, better safe than sorry, isn’t that what we have been here for all along?
Waterproofing the Drone
Yes, you don’t fly over a lake and you don’t fly in rain. But nothing is stopping your drone from crashing into a puddle or pool, right? When that happens, the electronic components in the drone may short (since the drone is still powered), and you will need to replace them.
Waterproofing your drone is not difficult nor it is expensive. You just need to apply silicone conformal coating onto all exposed electronic components such as the printed circuit board and solder joints. That alone can protect your drone from water damage, or at least buy you time to retrieve the drone.
If you need to understand more on the steps to waterproof your drone, remember to check my guide here.
Knowing when to Land
Beginners can easily get carried away while flying, and forgot that he needs to land before running out of battery. When that happens, the drone crash. If you are lucky, your drone may crash into bushes; if not, it may crash into concrete, or even pond!
Crashing the drone because of insufficient battery is a silly mistake. You should avoid that! And, by avoiding crashes, your drone lasts longer!
Refer to my other post if you need help finding out when to land your drone.
Better Safe than Sorry – It Never Gets Old
Much like how you couldn’t make everyone happy, you might not want to follow every single tip here due to the associated limitations. The end goal in protecting your drone should always be finding the right method that works for you. It might not be easy, and it certainly would not be a breeze, but there is always a way around things. You just have to look for the right exit.