
Best RTF FPV Drones for Beginners in 2026
Buying a ready-to-fly (RTF) FPV drone is probably the smartest move if you’re just stepping into the FPV hobby. RTF means the entire package comes as one bundle: the drone itself, FPV goggles, and a radio controller—everything you need to actually fly, right out of the box.
No soldering, no hunting for compatible parts, no mysterious compatibility issues. You just charge the battery, put on the goggles, and go. It’s the path of least resistance, and sometimes that’s exactly what beginners need.
That said, RTF kits come with trade-offs. You’ll get a transmitter with every kit, which means if you buy multiple RTFs, you’ll end up with a pile of controllers. The goggles and radios that come in the bundle are usually middle-of-the-road quality—functional, but not premium. And you’re definitely paying more per drone than if you’d built one from parts yourself.
But here’s the truth: if you want to start flying FPV now without worrying about what parts work together, RTF is your move. Here are the best options you can actually buy in 2026.
Best RTF FPV Drones for Beginners: What’s Changed in 2026
A lot has improved since the last generation of RTF kits. The radios are now ELRS-equipped, meaning better range and less latency. The drones are better tuned out of the box—softer, more forgiving for new pilots. Goggles are sharper. It’s a genuinely better beginner experience.
One thing hasn’t changed: whoop-style drones (the small, propeller-guarded ones) still dominate the beginner RTF market. They’re durable, crash-resistant, and can fly both indoors and outdoors. If you’re new to FPV, start here.
For Outdoor Flying: EMAX Tinyhawk Lite
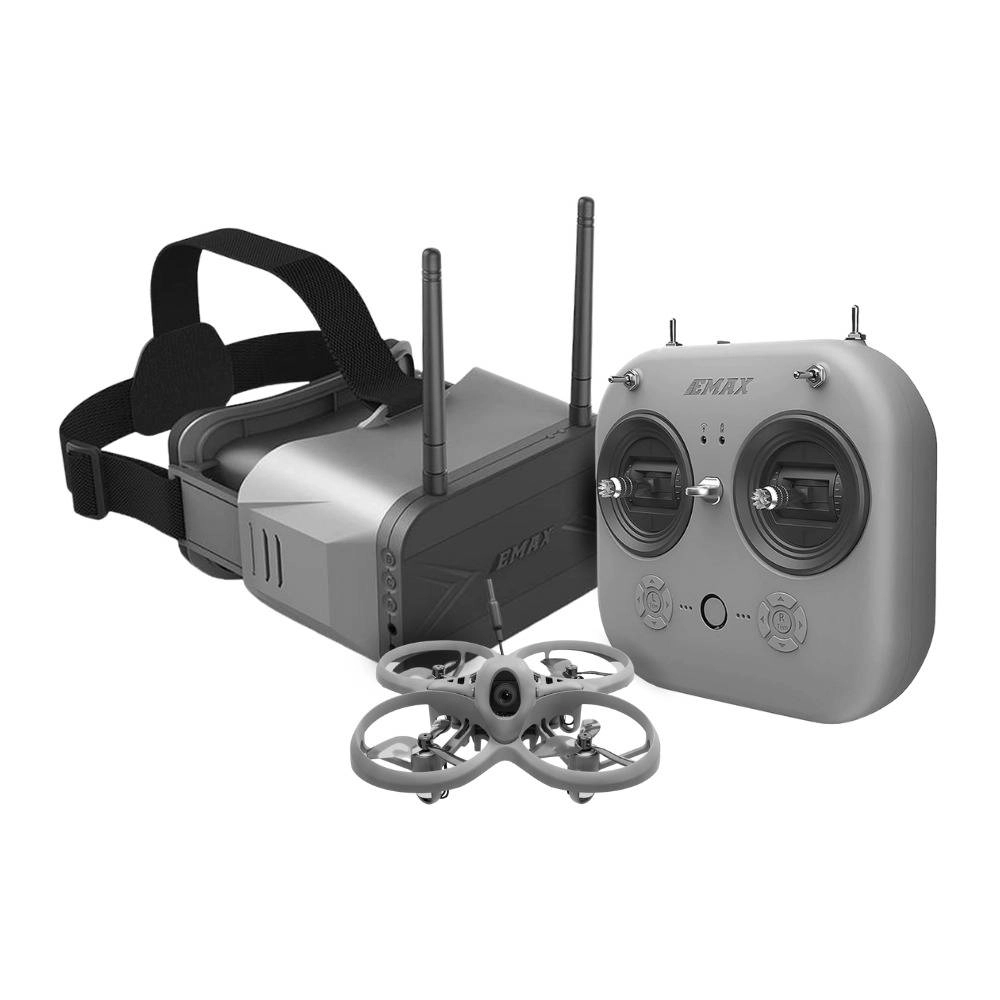
The EMAX Tinyhawk Lite is the new budget champion. It’s a 75mm whoop with an 0806 brushed motor—simpler and cheaper than brushless, but don’t mistake that for weak. This thing has solid power and handles outdoor wind reasonably well.
What makes it special is the tuning. EMAX softened the control rates significantly, which means your stick inputs translate to smooth, manageable movements. That’s huge for beginners. You get three flight modes: beginner, intermediate, and expert. Start in beginner mode, which gives you slow, predictable flight. Graduate to expert mode once you’re comfortable.
The package includes the E8 ELRS transmitter (serious upgrade—full-size layout, ELRS 2.4G radio link) and Transporter 2 goggles. Flight time is around 4-5 minutes, sometimes stretching to 8 with careful flying.
Pros: Affordable, durable, three-mode control, good transmitter included, outdoor-capable, honest beginner tuning
Cons: Brushed motor (less efficient than brushless), shorter flight time than alternatives, medium-quality goggles
Best Overall: BETAFPV Cetus X
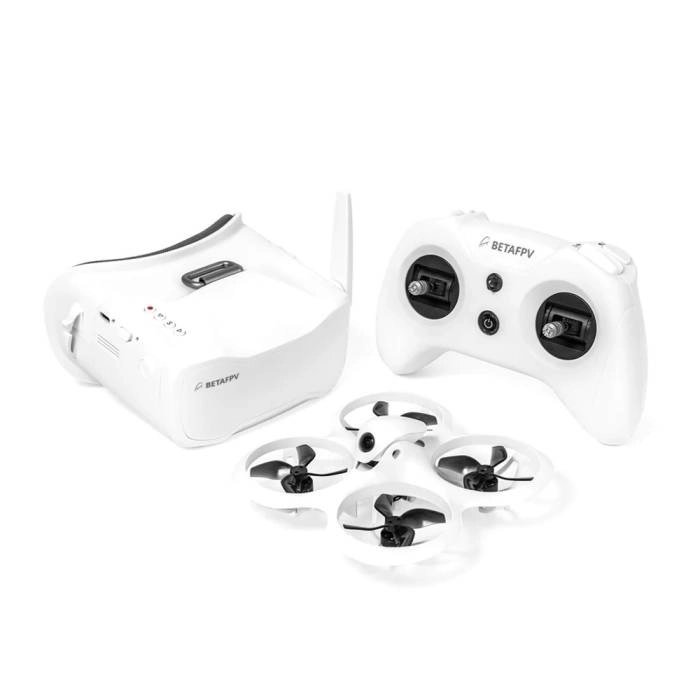
The BETAFPV Cetus X is probably the most recommended RTF whoop for beginners right now, and for good reason. It’s a 2S power whoop (more powerful than 1S equivalents) but tuned soft enough that you won’t feel overwhelmed.
What you get: a rock-solid airframe, 1103 11000KV brushless motors (efficient, reliable), and your choice of ELRS or FrSky D8 receiver protocols. The transmitter is the LiteRadio 3—full-size layout, comfortable to hold, and compatible with simulators. The VR03 goggles include DVR recording, so you can review your flights.
The real magic is the durability and tuning. This quad survives crashes that would destroy cheaper alternatives. And the PID tuning is genuinely soft—it’s been tested thousands of times in the community.
Flight time runs 3-5 minutes depending on your flying style. Get the ELRS version if you can; the range improvement over FrSky is noticeable and future-proofs your kit.
Pros: 2S power (better outdoor performance), excellent durability, quality transmitter and goggles, proven platform with huge community support, DVR recording included
Cons: Higher price, short flight time (3-5 min), steeper learning curve than slower whoops
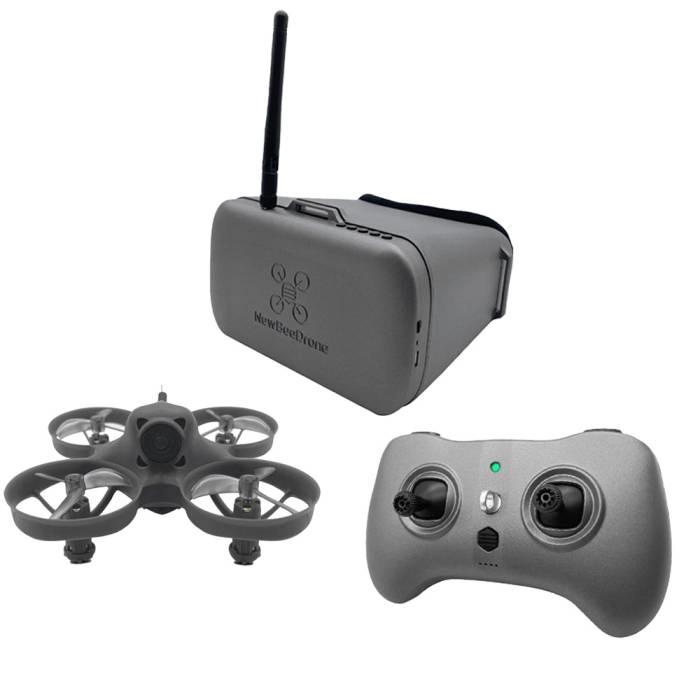
Budget Pick: NewBeeDrone VRDrone RTF Bundle V2.5
If your budget is tight, the NewBeeDrone VRDrone RTF is genuinely all-in-one. For about $180, you get the drone, goggles, radio, batteries, and charger—literally everything. This is the most affordable way to start FPV flying.
The catch? It uses NewBeeDrone’s proprietary BeeSign protocol, which means the transmitter only works with NewBeeDrone drones. You’re locked into their ecosystem. But if you’re just starting and want to test the hobby without dropping $300, it’s worth considering.
Flight time is decent (around 6-8 minutes), and the kit is incredibly portable—the goggles double as a carrying case with a built-in charger. It’s designed to be the ultimate travel-friendly FPV kit.
Pros: Cheapest complete kit, everything included, excellent flight time, ultra-portable, thoughtful design
Cons: Proprietary transmitter protocol (not compatible with other drones), smaller transmitter, less community support than EMAX/BetaFPV
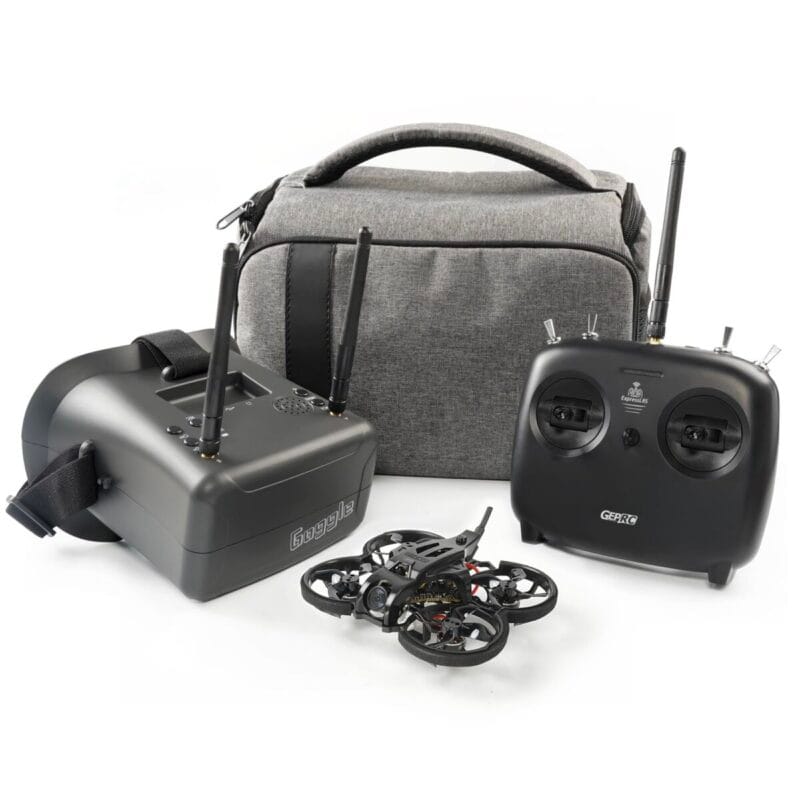
For Indoor Mastery: GEPRC TinyGO Racing
The GEPRC TinyGO Racing is purpose-built for indoor flying. It’s a 79mm whoop with a solid frame design and no-prop-in-view motor placement, which means cleaner video with less prop wash.
This is notable because GEPRC upgraded the radio transmitter—the TinyRadio GR8 now uses ELRS 2.4G, and the ergonomics are actually pretty good. Battery life stretches to 6+ minutes with their included 90C batteries.
The VR03 goggles are the same quality as you’ll find in other kits. The racing variant doesn’t include SD card recording (unlike the 4K version), but honestly, the goggles DVR is sufficient for reviewing flights.
One thing to know: this whoop is a bit noisier than EMAX or BetaFPV alternatives, and the prop guards aren’t as elegant. But if you’re flying mostly indoors and want proven indoor heritage, it’s solid.
Pros: Excellent indoor performance, good flight time, upgraded radio (ELRS), durable, includes batteries
Cons: Slightly noisier, less community presence than competitors, prop guards less refined
BetaFPV Aquila20 HD – Best Indoor Digital RTF Cinewhoop

The game-changer here is the new ArtLink P1 HD system. You’re getting 1080p@60fps video with around 60ms latency and a 400m range. For a small whoop, that’s ridiculous performance. The flight time hits around 10 minutes, which is genuinely impressive for a ducted quad. The 2S batteries keep it nimble, and the three flight modes (including beginner-friendly angle mode) mean you’re not thrown in the deep end.
This kit is genuinely beginner-friendly. The LiteRadio 4 SE transmitter is intuitive, the VR04 HD goggles are comfortable, and the whole ecosystem just works together. If you know absolutely nothing about FPV and you’re not willing to learn, this is your entry point.
Pros: ArtLink ecosystem, good signal penetration, and forgiving flight characteristics—ideal for learners transitioning from analog FPV.
Cons: Not suitable for aggressive flying, optical flow is unreliable above 3m, image quality shows graininess at speed, goggles fit poorly for Western face shapes, and you’re locked into proprietary batteries with no onboard recording backup.
Flight Modes: Angle vs. Acro vs. Horizon
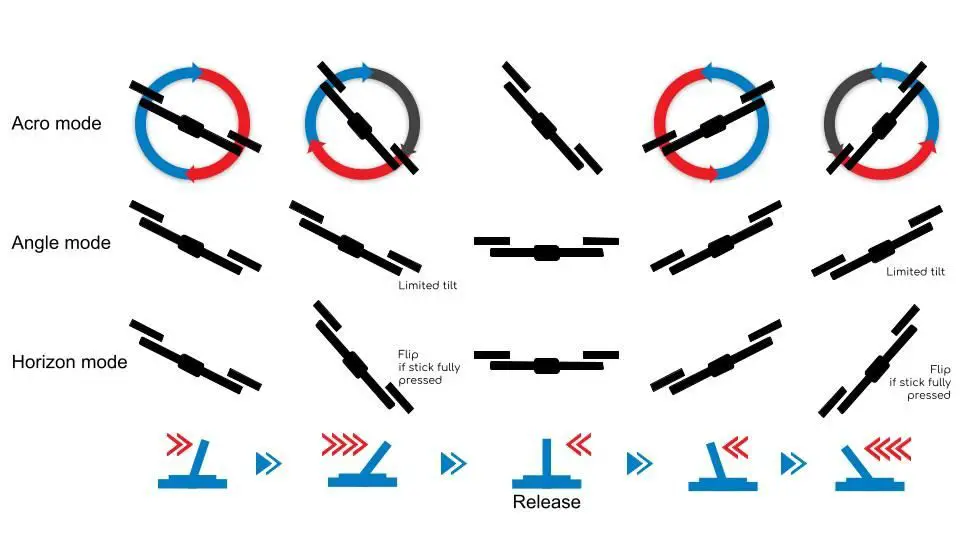
Every RTF whoop comes with multiple flight modes, and understanding them is your fastest path to not crashing constantly.
Angle Mode is what you start with. Push the stick and release—the drone automatically levels itself. You can’t flip or roll. This mode holds you back from learning full acro flight, but it’s your safety net.
Horizon Mode is angle mode’s cooler cousin. It auto-levels when you release the sticks, but you can force flips by holding the stick. It’s a stepping stone between angle and acro.
Acro (or Manual) Mode is the real deal. The drone doesn’t auto-level. You control everything: throttle, pitch, roll. It’s harder, but it’s also where FPV flying becomes fun. This is where tricks, smooth lines, and freestyle moves happen.
The golden rule: practice angle mode first, but plan to move to acro. Don’t get too comfortable in angle mode. Yes, you’ll crash more in acro. Yes, that’s the point. Simulator practice is your best friend here (and costs you zero drones).

Beginner Tips That Actually Matter
Simulator Practice Saves Drones (and Money)
Fly in a simulator first. Seriously. LiftOff, DRL Simulator, or even free options like Velocidrone are good. Get 10-20 hours in a sim before your first real flight. You’ll crash less, learn faster, and your real drone will thank you.
Battery Management Is Non-Negotiable
LiPo batteries are powerful but temperamental. Never over-discharge them (watch your OSD voltage). Never crash hard and fly again immediately—let the battery cool. Charge to storage voltage if you’re not flying for a week. Ignore this and you’ll puff a battery, potentially on your bench.
Stick Movement ≠ Drone Movement in the Beginning
All modern RTFs have soft tuning and expo. Your tiny stick movements translate to tiny drone movements. That’s intentional. Don’t jab the sticks. Be smooth. Let the drone teach you.
Never Tune Your RTF (Yet)
The out-of-the-box tuning is tested and safe. Don’t touch the PIDs. Don’t change the rates. Fly it stock until you have 100+ flights and actually understand what you’re changing. Most crashes that feel like “the drone’s fault” are actually pilot error.
Fly Line of Sight Too
FPV is immersive, but always know where your drone is in the physical world. Keep a spotter, or take off your goggles every 20-30 seconds. You’ll avoid walls, trees, and flyaways.
Why RTF Still Makes Sense in 2026
The FPV market has exploded with BNF and PNP options, so why still recommend RTF? Because you’ll spend less time troubleshooting and more time flying. A beginner’s job is to learn to fly, not to debug radio protocols or research XT30 connectors.
Yes, you’ll pay a premium. Yes, you’ll end up with extra transmitters. But your first weeks of FPV should be about joy, not frustration. RTF gives you that.
Final Thoughts
The best RTF FPV drone is the one you’ll actually fly. All the options here are solid, community-tested, and genuinely beginner-friendly. Pick based on your needs: tight budget? VRDrone. Want the best all-rounder? Cetus X. Prefer outdoors on a smaller budget? Tinyhawk Lite. Indoor specialist? TinyGO Racing.
Then do this: buy the drone, buy a simulator license, invest in a battery charger and spare batteries, and commit to 100 flights before you upgrade anything. By then, you’ll know exactly what you want in your next quad.
Welcome to FPV. It’s chaotic, frustrating, and absolutely worth it.