
Going the Distance – 6 Tips on Long Range FPV
Apart from the extreme rush of adrenaline that you get from racing, FPV drones are likewise praised for the view that it provides in long range FPV shots. Long-distance flying may seem easy, but it isn’t. In this guide, I’ll show you 6 tips on how to fly long range FPV so that it doesn’t end in a disaster.
Do check out my recommended long range FPV drones and DJI FPV if you need a new quadcopter for your long range adventure!
Use ELRS or other Long Range Radio Link Protocol
To start, the main thing that is hard to maintain when your drone is miles away from you is control, and this is where your radio setup comes into picture.
To fly long range FPV, use either ELRS or ImmersionRC Ghost for your radio if you want to stay at 2.4 GHz. Otherwise, use 900 MHz radio such as Crossfire. ELRS is generally the cheapest, and is natively supported by a few radio transmitters.
Your entire radio setup dictates the range, the latency, and the efficiency of communication between the radio transmitter and receiver. The communication between these two is aided by your radio antenna, which then has its specifications that you need to consider throughout the build.
Let us get this out in the open: common radio setup for other FPV purposes? Might not exactly be sufficient for long range flights.
Common radio setups utilize the most common RC frequency of 2.4 GHz, which is good up to 1-2 km in real life. Interference caused by the surrounding environment can further reduce the range. Hence, having extra range gives you more buffer from a safety’s perspective, not to mention that it allows you to fly even further.
For long range flights, you would want your radio signal to be strong and have further range than your video’s capability. This ensures consistent connection so that you can control your drone even when your video feed is cut off.
Use a lower frequency radio to achieve a stronger signal and longer range. That will allow better penetration through obstacles and further range. An example of popular radio available in the market is the TBS Crossfire operating at 900 MHz band.


Another promising radio is the ImmersionRC Ghost (GetFPV | Banggood). While the Ghost uses 2.4 GHz, it boasts an incredible range of more than 40 km (~25 miles) in theory, using the LoRa technology. The advantage of using Ghost is that it is flexible. You can switch between long range at a higher latency and racing with low latency.
Express LRS is yet another option that you may want to consider. It is a new and affordable technology.
ELRS can support both 2.4 GHz and 900 MHz. 2.4 GHz ELRS is more than enough for 10-20 miles flight. It is also less susceptible to interference, and has a lower latency.
If you want to use non-conventional radios, there are 3 main components to consider: the receiver, transmitter, and antenna.
There are more and more radio transmitter with built-in ELRS. But, those with built-in Crossfire and Ghost are rare.
Some radio transmitters (eg. TBS Tango 2) might support Crossfire natively. But for the majority of the cases, your radio transmitter needs to have an additional module bay to fit the Crossfire or Ghost transmitter.
There are 2 sizes of transmitter module bays: the standard JR module which is bigger, and the lite module which is smaller. Make sure you buy the correct one which fit the size of your radio transmitter. Otherwise, you need to buy a separate conversion kit.
Obviously, you also need to fit the corresponding receiver and antenna on your FPV drone. If you are using 900 MHz system, make sure you use the antennas supporting 900 MHz. You can’t use a 2.4 GHz antenna on a 900 MHz system.
Do take note, however, that there are certain regulatory restrictions when it comes to certain frequencies. You may need a license to operate anything lower than 2.4 GHz. Doing your own due diligence on the legal boundaries is a great way to avoid any hassle later on.
I have an article on radio transmitter and radio link protocols if you want to learn more.
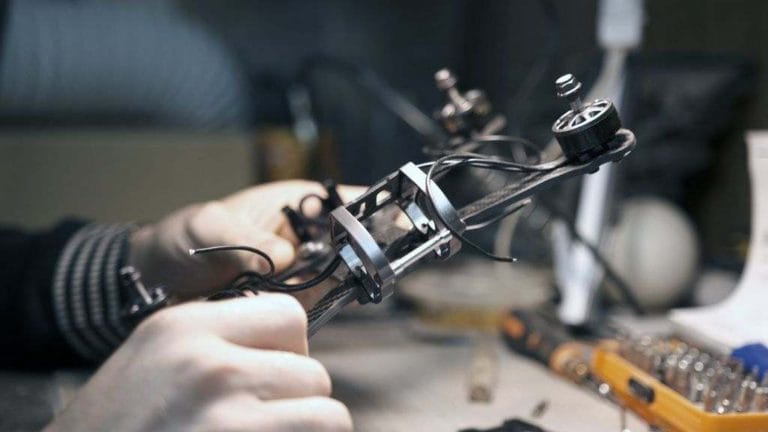
Use High Output and Preferably Digital FPV System
When you are flying long range FPV, you rely solely on the video feed for visibility. Hence, securing a good FPV setup is important in long range flight. Below are what you need to do.
Video Transmitter

The VTX is the part of your drone that transmits the video feed from the cameras to your goggle. As such, ensuring its quality using renown brands such as TBS will be a great additional step in ensuring the FPV quality and performance at long range.
You should also consider going digital to achieve a better video signal at long range. Here is a list of reliable digital counterparts of analog VTX that you can get.
In addition to that, you need to use a higher power output for your VTX in order to fly long range FPV. Otherwise, you will not get enough penetration and you will lose your video mid-flight. 600 mW is a good start. But if you need to fly even further, use 800-1200 mW output.
Bear in mind that using such a high power output will interfere with other pilots within the vicinity. But that is not necessarily a concern when flying solo long range flights. Having said that, make sure you are using the legal power output defined in your country.
FPV Goggle/Video Receiver
When it comes to your goggles, you could start with ones that come with a receiver module bay (see my best FPV goggles). That allows you to upgrade your video receiver to support long range flight better.
Some great receiver modules that you could use are TBS Fusion and ImmersionRC RapidFire. It might not be the easiest when it comes to budgeting, but it does provide the quality that you would want for something so risky and iffy to perform.
An important feature in VRX is the diversity system. There are 2 types of diversity system: receiver diversity and antenna diversity.
Go for VRX with receiver diversity. Such VRX has 2 modules or more. Each module picks up the signal from your drone, and the system either merges the signals to improve its quality, or automatically switches between signal sources to give you a consistent, high quality video feed. This is sometimes called the “true diversity”.
Older generations of diversity receivers simply switch to the strongest signal. While it is done automatically and reasonably fast, there will be a momentary blank screen during the switch.
Newer generations of diversity receivers such as TBS Fusion, ImmersionRC rapidFIRE, or Skyzone’s SteadyView, combine the signals from 2 sources to create an even better quality video. Some of them also have sync pulse reconstruction technology to prevent the video from tearing when the signal is low.
There is another type of diversity called antenna diversity. A receiver with antenna diversity can connect to 2 or more antennas. That means you can have both directional and omnidirectional antennas on your goggles for better video quality. That results in both overall wide angle coverage at short range, and a narrow but long range coverage.
While antenna diversity is not as good as receiver diversity, it is still better than no diversity.
Antenna
The antennas of your VTX or goggle, on the other hand, are responsible for the quality of the video feed itself.
The spec that you should look into is the antenna gain, which is generally measured in dBi. By virtue, a higher dBi value would result in better video output at long range. You should also consider those with axial ratio close to 1, so that you have minimum interference.
I recommend you to use linearly polarized, directional antennas for better range and penetration. Circularly polarized antennas are also a good option as they have better resistance towards interference, at the expense of range. I would recommend getting Lumenier Axii Duo Patch or Patch for the best result.
Never use only an omnidirectional antenna on your video receiver for long range, as you will not achieve the desired flight distance.
One thing to remember though. When using a directional antenna, make sure you are facing towards your drone for optimum signal. If you don’t do that, the signal strength will drop sharply.
Positioning could also affect the antenna’s capabilities. You want to make sure the antennas stick out of the frame so that it’s not obstructed. For better signal strength, most pilots will also position the antennas perpendicular to each other.
Lower Frequency FPV System
FPV system of most quadcopters use the 5.8 GHz frequency band. This is because the 5.8 GHz system is small and reliable. One of the limitation though, is the range.
There are FPV systems using lower frequency band such as 2.4 GHz and 1.2/1.3 GHz. Low frequency FPV systems offer longer range than the 5.8 GHz system. However, there are a few disadvantages using them:
- Bulky antenna which is not suitable for small quads.
- Lower image quality than 5.8 GHz’s.
- 1.2/1.3 GHz is illegal in most countries, or required permits to operate.
- Interference with 2.4 GHz frequency used by your radio transmitter.
- Lack of compatible VTX and VRX.
Use Li-Ion Battery and Manage Your Flight Time
The battery of your drone is what keeps it on air. It requires proper management and scrutiny to ensure this critical component is kept at its most optimal condition. The last thing you want is to have your drone crash into nowhere due to insufficient battery.
Time to Come Home
Managing the battery for long range flight is hard. To start, the battery capacity should be one of the top priorities, especially if you are still trying to test the waters of long-distance FPV flight. By knowing the capacity of your drone in mAh, it will be easier to calculate the point at which turning back is required.
In your initial attempt for long range flight, you should probably turn back when 50% of your battery capacity has been consumed. It can be higher or lower depending on how far you have traveled vs the distance the drone needs to travel to return back to you. As you gain more experience and confidence, you can adjust that accordingly.
You should also consider the current battery health, as that could affect how much juice your battery can store. Given the battery capacity deteriorates over repeated uses, you will need to include monitoring of the battery voltage to determine the turning point.
Use Li-Ion Battery
You should also consider using a Li-Ion battery pack instead of a LiPo battery pack for long range flight. Li-Ion batteries are more energy dense than LiPo batteries. What that means is, gram to gram, Li-Ion battery holds more juice and hence can support your drone to fly longer without adding weight to it.
The downside of a Li-Ion battery is the lower C rating compared to a LiPo battery. However, that doesn’t really matter, since unlike racing, you do not need to have the power and speed in long range flight.
Reduce Battery Consumption
On the other hand, power consumption efficiency should likewise be considered, as this would greatly influence the speed by which your battery power will decline as well. Building it as light as you can, opting for low KV & high efficiency motors, choosing large propellers, and lowering the pitch of your props would greatly decrease the power consumption of your drone.
Do take note, however, that these methods are aimed at reducing the total demand (for current), but will in no way improve the current health of your battery. Try to take good care of your battery to prolong its life and defer replacements, or reduce the risk of sudden accidents on the field due to battery failure.
Care for Li-Ion batteries is not as stringent compared to LiPo batteries because they are not as dangerous. The 2 key principles are still the same though: do not over charge it and do not over discharge it
GPS and Buzzer are Compulsory

Accidents are inevitable, especially when you are completely new to the field of long-distance FPV flights. Moreover, as mentioned earlier, it is not easy to decide the right time to fly back. Underestimation of battery drain can easily result in crashes.
As such, taking certain measures to help you in recovering your drone faster when your camera and radio have failed or when the battery is depleted is crucial to make sure that your investment is not wasted at all.
Having a GPS is a must for all long range drones. It provides you with specific coordinates of your drone’s whereabouts, which helps you to locate your drone after a crash.
In addition to that, you could set up a beeper (GetFPV | Banggood) in your drone so that it beeps when you press a button on your radio transmitter. That allows you to easily find out where your drone is when you are at the crash site. The key here is to make sure the buzzer is self-powered. If it is powered by your drone, it becomes useless when the battery pack is ejected due to a crash!
When it comes to your goggles, video failure could result in the loss of real-time video footage. By adding a DVR, preferably one with an auto-start feature, could help you track the last known position of your drone through its recorded footage.
It seems like a hassle to set them all up, but perhaps it would not be much of a thinker if you try thinking about what would happen if you lost your drone in an instance. Seems like a silver lining, doesn’t it?
Set Up Failsafe
Failsafe is a feature that kicks in when you lost your radio and/or video signal. For long range pilot, you will want to make sure that you have set up GSP rescue mode as your default failsafe.
In the GPS rescue mode, if your loss your signal, the drone will automatically fly towards the initial launch location. You will be able to take control once you regain the signal. While this feature is not robust, it is better than losing your drone. Note that you will need GPS to enable this mode.
Use iNav for Long Range
If you want to fly long range, you should really consider using iNav. Similar to Betaflight, iNav is a configurator or software that you can use to set up your flight controller. But unlike Betaflight, iNav focuses on GPS features, which brings long range flight to another level.
iNav’s return to home feature is probably the key feature that you need the most for long range flight. Unlike Betaflight’s GPS rescue mode, this is a real return to home home feature.
You can configure your failsafe such that when the radio is lost, your drone will slowly return to its launch position. With this feature, you eliminate the risk of losing your drone due to poor radio signal. You can also trigger return to home through the preset button on your transmitter.
Another exciting feature that iNav offers is the waypoint flying. This feature allows autonomous flying, where you can set the waypoint for your drone to follow.
To use iNav and enjoy its full features, you will need a compatible FC (preferably F7 and above), GPS, barometer and magnetometer.
Additional Information
Is long range flight legal?
When we consider the need for visual line of sight in the legal requirement (eg. US), long range is probably illegal. There is no way for you to see the drone, which is more than a mile away from you.
Having said that, you are able to get waiver under part 107.31 for flying beyond visual line of sight (BVLOS). Other countries might have similar waiver. The video below explains the risks of flying BVLOS and the process on getting waiver.
Putting line of sight aside, VTX power output is another factor that requires consideration from the legal perspective. Not all countries allow more than 25 mW output. And 25 mW is definitely not enough for long range flight.
Always take note of the mandates in your countries to ensure that you are still flying responsibly.
What’s the point of flying long range if the video range can’t keep up with the radio range?
Indeed the video signal would not travel as far as your radio. But, if you have a DVR on your drone, you can record the scenery and view it later.
You can also opt for a “shorter” long range, where your FPV video can still be received by your goggle. Even with a shorter distance, we are talking about 4 km (~2.5 miles). That’s quite far!
Do I really need to use a long range radio if I am flying within my radio’s limit?
Well, ideally you don’t need to. But it is quite hard to gauge the “limit” of your radio. What if the radio signal suddenly drops due to interference? What if you accidentally fly beyond the safety limit? The 900 MHz band, Ghost and ELRS technology offer better penetration and stronger signal than the typical 2.4 GHz. I’d rather spend some extra bucks than losing the whole drone. Again, better safe than sorry.