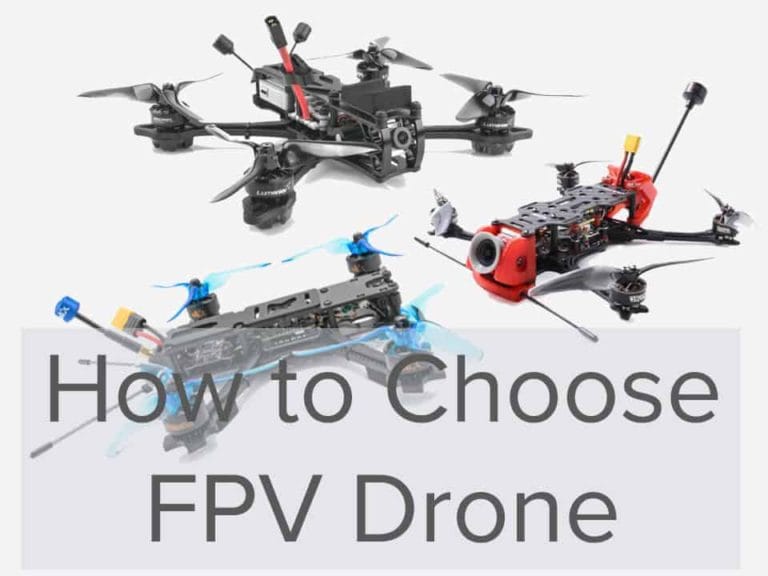

10 FPV Beginners Mistakes that You Should Avoid
Are you making one of those FPV beginners mistakes that all pros wish they would have avoided? I’ve consolidated the top 10 mistakes so that you can avoid them to save you some money while giving you a better experience in your FPV journey.
- Resorting to Cheap and Unreliable Drone
- Skipping Drone Simulator
- Going All-In on Your First Drone
- Relying Too Much on Auto Mode
- Completely Disregarding Failsafe
- Not Taking Off the Props During Beta Tests
- Failing to Attach the Components in the Right Orientation
- Using High Power Video Transmitter
- Flying Outside Your Line of Sight
- Lending Your Drone to Someone Else
- Final Thoughts
Resorting to Cheap and Unreliable Drone
The first thing that you should note about this field is that it is, by no means, cheap. The components necessary to build your drone, or even the budget required to purchase an RTF or Ready to fly drone, is usually more than what you would expect.
Usually, the amount that you will be spending will range from around $200 to $400, depending on your supplier and specifications.
There will be various online shops that will offer you “reliable” drones for a lower price, but this is usually a trap for most beginners. Buying low-quality materials will simply result in consistent damages and repairs that will inevitably cost more in the long run.
The rule of thumb here is that if you are spending an average of around $300 for RTF, you are in the most optimal spending zone. Anything higher than that might mean that you are either buying overpriced parts or specifications not suited for a beginner. If you are spending lesser than $200 for RTF, you might be at risk for subpar components and foreseeable damages soon.
It is certainly expensive, especially for casual hobbyists, but a little more money spent might mean “less money wasted” in this case.
Here are my recommended RTF drones for beginners if you need help in choosing one.
Skipping Drone Simulator

The simulator is probably the most neglected part. After all, why would you fly virtually if you have the drone physically in front of you.
You will definitely crash a lot when you begin to learn how to fly an FPV drone. Each crash will damage your drone, bit by bit, and ultimately thrashed your drone. This means you had to fork out more cash to buy a new drone.
You can avoid this by learning through a simulator. Here is a list of simulators that you can rely on.
Modern simulators are designed to mimic the real flight physics as close as possible. By learning through a simulator, you picked up the necessary skills without damaging your drone.
As you’ve gotten better in simulation, you can transition to flying your physical drone with less crashing. That would save you a lot of money.
When training though simulator, you must use the radio transmitter or controller that you will be using for your drone. You must not use the gamepad or keyboard because it will be a waste of time. Using gamepad or keyboard will build muscle memories that is not-transferrable when you shift to a real radio transmitter. Hence, you should get a good radio transmitter for your simulation drills as soon as possible.
A drone simulator can be as cheap as 20 bucks, which is way cheaper than replacing your drone. I see no reason for skipping it.
Going All-In on Your First Drone
Perhaps you should read this out loud, once, or probably thrice just to get it embedded deep into your system: you will crash!
Getting into the field of drone racing is certainly not easy and learning the skills necessary to operate your drone flawlessly is time-consuming. You will crash your drone during your first ten or hundreds of flights, making it ideal to somehow hold back on your budget when you are purchasing your very first drone.
When you are a beginner, and trust me, you would smell like a beginner when you enter a shop. You might be presented with either overpriced components or fully blown specifications that are, by no means, suitable for a beginner.
In addition to that, many shops do not even have the ideal components for a well-built drone, and you might be spending on unnecessary specs without even knowing it.
High-level specifications and amateurs make for the worst combination. Going all-in will simply inflate your expenses twice or thrice due to repairs, damages, and poorly handled devices.
Fly smart, not hard. Try to keep your budget from burning a hole through your wallet that way.
Relying Too Much on Auto Mode
Being able to immediately fly your drone is like being able to taste the clouds for the first time. It is something that you feel like you must do once you learn that you can do it.
As such, this usually results in beginners relying on the “auto” mode embedded into the drone to easily control it and fly it with a little less effort than the “acro” mode would usually require.
The problem with this is that the auto mode develops bad habits within you as a pilot. Terrible habits are certain quirks that you become accustomed to just because your flight skills are somehow being corrected by the device itself.
Relying on auto mode will completely subsume your subconsciousness and will throw you off once you shift to the acro mode to perform harder maneuvers, flips, and movements. Starting with auto mode will result in lasting problems and difficulties in learning acro mode sometime in the future.
In a nutshell, it is harder to “unlearn” auto mode than it is to “learn” acro mode. It is hard to learn acro mode at first, but it will even be harder once you begin to start putting it off for later.
You may refer to my article if you want to understand more on the differences between auto and manual modes.
Completely Disregarding Failsafe
Ever heard of the “I lost my drone day?” It seems like a simple quip at first, but once you learn that this is another term for Christmas, it starts to slowly loom on you, doesn’t it?
Losing your drone is like throwing away your wallet – it is money wasted, the end of the story. Imagine spending a few hundred dollars for a drone, only to lose it after using it for a few hours.
Various safety mechanisms are now in place to avoid this, and one of them is the functionality known as the failsafe.
The failsafe is a mechanism designed to shut down the motors of the drone once it loses its signal from the controller. This prevents unnecessary crashes and rogue flights that might injure other people or damage the components inside due to impact.
Taking some time to set up your failsafe and making sure that it is working should be your top priority, especially when you are flying in an unfamiliar or crowded place.
Take the props off, turn on the radio, fire up the motor, then turn the radio off. This routine will identify if the failsafe is working as it should and would turn off the machine once the signal cuts off.
Not Taking Off the Props During Beta Tests
I cannot possibly emphasize this even more, but you should always, always take off your props when you are testing your drone whether it is indoors or outdoors.
Imagine this: you are checking to see if the motor is simply malfunctioning or your battery is dead, you plug the drone in using a USB cable, then you check the problem. Sounds familiar? If you have done this before, do not, and we repeat, do not do this again.
When checking any component of your drone, make sure to take the props off to avoid injuries and accidents from props unexpectedly running.
Although it seems like it will not hurt you that much, the high-speed props will most definitely cut you, injure you, and even render you unable to use your hands for a few weeks!
It seems like a grim warning for something as trivial as propellers, but this is simply a mistake that you should avoid. Again, keep the props off during tests!
Failing to Attach the Components in the Right Orientation
It might be getting old at this point, but as usual, even the assembly of drones requires skills and sufficient training to perform.
A drone is composed of various parts that you would have to attach correctly for them to work as intended. However, beginners will often make the mistake of switching up the orientation of the props and flight controller during repair or assembly.
Props are often marked with a series of numbers that will indicate their rotation as to be either clockwise or anti-clockwise. Correcting this rotation to match the rotation of the motor is essential to ensure that the drone will not violently flip during flight.
A great tip that you could utilize for prop attachment is “right turn, right rear,” which means that you should attach right-turning props to the motor located on the right-hand-side rear position.
In addition to that, the flight controller’s orientation should also be corrected as it will usually affect the parts that will serve as the front and rear motors. An arrow indicative of the “north” or front position is usually printed on the flight controller itself, making it easy to identify the correct orientation necessary for your FC.
Using High Power Video Transmitter
You would probably fly alone when you start this hobby. It’s completely normal that you want to turn your video transmitter to 400 mW or more when flying alone to get the best video signal in terms of range and stability.
However, when you start to fly with other pilots, you need to switch to 25 mW instead. This is because while having a high power transmitter give you better range and stability, it interferes with the signals of other pilots.
As best as possible, get a drone or a video transmitter with switchable power output so that you can alternate between different power output as required.
A 25 mW output will be ideal for flying in groups. In fact, it is the only legal output in many countries outside US. In most cases, you need a Ham radio license to operate anything beyond 25 mW.
Do note that a video transmitter with a higher power output is not necessarily better. The range offered by the video transmitter does not increase linearly with the power output. As the power output goes higher, the increase in range will be of smaller magnitude.
Flying Outside Your Line of Sight
To ensure that your drone will be safe throughout your flight whether it is during practice or in an actual race, you should always keep a clear visual on your drone. But how can you do that while wearing an FPV goggle?
You may ask someone to be your spotter just in case your drone goes rogue and flies out of sight. You can usually ask for this kind of help from flight club members that will be more than happy to help.
Taking off your FPV goggles during maiden flights is also recommended to first confirm that everything is working correctly and that no unexpected crashes will occur. These are just simple recommendations, but they will go a long way in keeping your drone and your financial investment safe and secure.
Lending Your Drone to Someone Else
Flying an FPV drone is cool, and there will be a time when someone close to you asks you to lend him/her your drone. It could be your best friend, it could be your girlfriend. My advice to you is, don’t borrow them!
You have been flying your drones for many hours. You know how tough it is. Do you seriously think that a person who has no prior experience before would not crash your drone?
If you really want them to experience the thrill of an FPV drone, fly the drone with your goggle off. Let your loved one wear the goggle instead! If they really need to control the drone, you better let them do it in a simulator! After all, you have also started from simulation, right?
Never let anyone fly your drone unless you are ready to let him break it!
Final Thoughts
The amateur phase is a stage that all drone racers must go through. Even with immense talent and skills, no one is necessarily immune to beginner mistakes that are brought upon by inexperience. The important thing is that you must at least try to learn from these shortcomings and develop along the process towards greater heights. It might be a drone “race,” but everyone climbs to the top at their own pace.