
How to Build an FPV Drone – Step by Step Guide
When I was planning for my first FPV drone build, I was so confused. There are so many components in an FPV drone that interact with each other and I wasn’t sure where to start. I believe many beginners would face the same situation as me. Hence, I’ve written this guide to walk you through on how to build an FPV drone.
To build an FPV drone, first, decide the size of your drone before buying the right frame, motor and props. Calculate the motors’ Amp rating to select the ESC, followed by an FC. Choose the desired FPV system, and install a suitable VTX and camera. Mount the radio, complete the Betaflight setup and lastly, test your build.
I assume you already know how to fly an FPV drone. If you don’t, please learn how to fly an FPV drone through simulators, and an RTF or BNF drone. Otherwise, you will be causing a lot of damages on your first build which you have spent countless effort to build.

Why should I Build My Own FPV Drone?
While many pre-built drones are good, many pilots build their own customized FPV drones to stay competitive. FPV racers rely on both their skill and drone setup to beat their foes. Others build their own customized drones to perform harder tricks, to fly longer or further.
Even if you are a casual pilot, having a drone built by yourself makes it unique to yourself. You get to use the components that you want to use, and there are limitless combinations.
Planning the Build
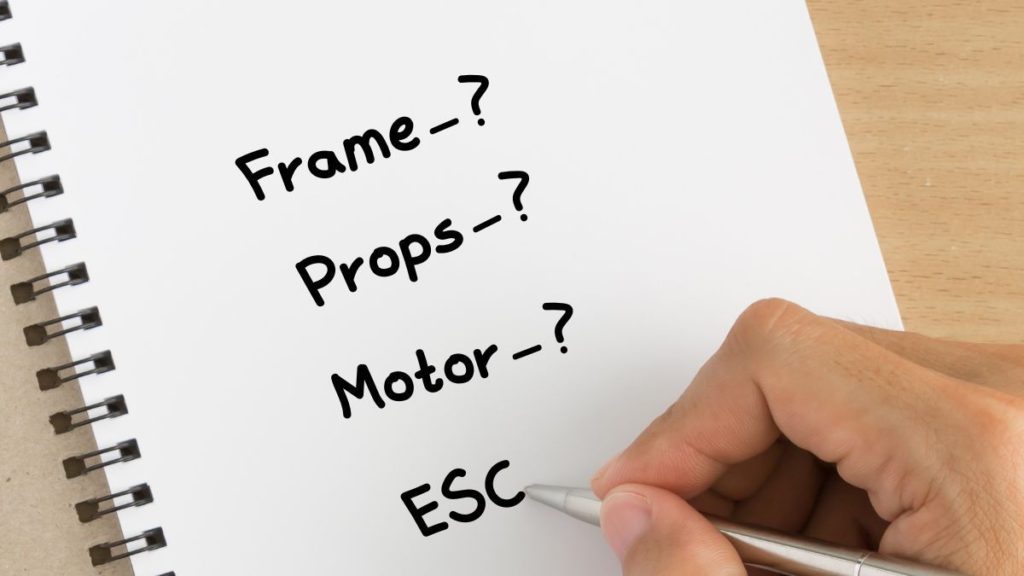
Planning a drone build is not an easy task because you need to make sure each part is compatible with each other. An easy way out is to buy DIY drone kits, Those kits already contain compatible components so that you don’t have to worry about buying incompatible parts.
If you still want to proceed with your own DIY drone build, continue reading.
Deciding the Size of Your Customized Drone
The first thing that you need to do is to decide whether you want to build a 3” drone, a 5” drone or whatever sizes that you have in mind. This is because the size of the frame will decide the specifications and weight of other components.
As a general rule of thumb, 5” in suitable for outdoors while 3” or below is suitable for indoors. Technically, nothing is stopping you from flying indoors or outdoors with whatever drone you have. However, bigger drones are harder to maneuver indoors while smaller drones can be swept away by strong wind outdoors.
If you plan to participate in multiGP races, you can refer to their website so that you can plan your build towards the classification that you’d like to participate in.
Once you have decided the size of drone that you want to build, you can proceed to choose the frame. Do check out my recommended frames and how to choose the right frame for your FPV drone.
Note that freestyle and racing drones use different frame design. If this is your first build, go for a freestyle frame because it has more space, making it easier for you to work with your parts.
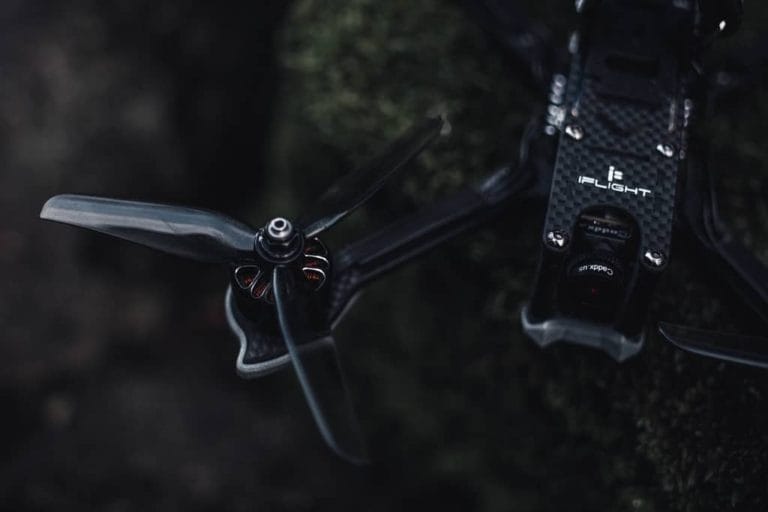
Select Motors and Propellers
Now that you have decided the frame, it’s time to search for the right motors and props. Fortunately, the basic specs of motors and sizes props are quite standard, depending on the size of your frame.
The table below shows the recommended combination of frame size, prop size, stator size and KV. This is merely a recommendation and it is not casted into stone. In fact, many powerful motors used in 5” FPV racing have much smaller KV than 2300 KV.
| Frame size | Props size | Stator Size | KV |
|---|---|---|---|
| ≤ 150 mm | 3″ | ≤ 1306 | 3000-4000 |
| 180 mm | 4″ | 1806 | 2600-3000 |
| 210 mm | 5″ | 2204-2208, 2305-2306 | 2300-2600 |
| 250 mm | 6″ | 2204-2208 | 2000-2300 |
| 350 mm | 7″ | 2206-2212 | 1500-1700 |
| ≥ 450 mm | ≥ 8″ | ≥ 2212 | ≤ 1200 |
Do check out my guide on what are the other things that you need to know when choosing the motors and props.
After you have shortlisted a few motors and props, you should find out the thrust generated by the motor/props. This information is available either from the manufacturer, or you can find it at the miniquadtestbench. From the same site, you can also find out the efficiency of your motors. Whenever possible, you want the most efficient motors for your build.
Electronic Speed Controller
With the motor and props selected, you should proceed to ESC. I strongly recommend you to using a 4 in 1 ESC to reduce the complexity of wiring and soldering, especially if this is your first build.
Aside from considerations such as firmware, protocol, processor and etc., you should really make sure the current draw of the ESC is able to support your motors.
For instance, if your motor requires 21 A, your ESC should have a 20 A rating or higher. An ESC can work under overloaded conditions for 10-20 seconds. So it is okay if the ESC’s maximum current rating is 3-5 Amp lower than the motor’s max current draw.
Note that if you are using a 4 in 1 ESC, the stated current rating is per motor and not for a total of 4 motors.
You also want to make sure the size of the ESC can fit into the mounting of your frame. For instance, if your frame supports only 30 x 30 mounting, you shouldn’t use a 25 x 25 mounting ESC.
Another dependency that you should take note of is the LiPo battery pack. The ESC specs usually spell out what voltage or number of battery cells it supports.
Flight Controller Options
The next item that you should start working on is the FC. Check out this guide on FC if you need help on choosing an FC. The key dependencies here are the mounting size, Betaflight support, radio receiver compatibility, and number of UARTs.
Similar to the ESC, you want to make sure your FC fits into your frame. Since you will be stacking both ESC and FC later, both should also have the same mounting size.
The majority of the FC would support Betaflight, which basically allows you to configure your drone. Other popular configurators are the closed-sourced FlightOne and KISS, which work only with their own radio receivers.
While most Betaflight-supported FC can support a wide range of radio receivers, there are exceptions. For instance, Holybro Kakute F7 FC doesn’t support PPM or PWM radio receivers. Instead, it supports protocols like SBUS. So make sure this is noted when planning your build.
Meanwhile, the numbers of UARTs will decide how many peripherals you can connect to. For instance, radio receivers, telemetry, GPS, and etc.
Another thing to note is the OSD (on screen display). While I recommend you to get an FC with OSD, you can actually buy an OSD separately and add it to your build in the future. Just make sure you have enough UARTs for your external OSD so that you can upgrade your drone.
FPV System
Next up is your FPV system. Choose the camera, VTX, antenna, and a goggles that fits your needs. Aside from voltage rating, there are a few other dependencies here:
- Digital vs Analog – If you decide to use the digital system, make sure your components (mainly the FC and frame if you plan to use DJI) support digital and vice versa.
- Camera size – make sure your camera fits the frame of your choice.
- Antenna connector – ensure your antenna’s connector fits to your VTX and VRX.
- Antenna polarization – ideally both the antennas on your VTX and VRX should have the same polarization and same handedness.
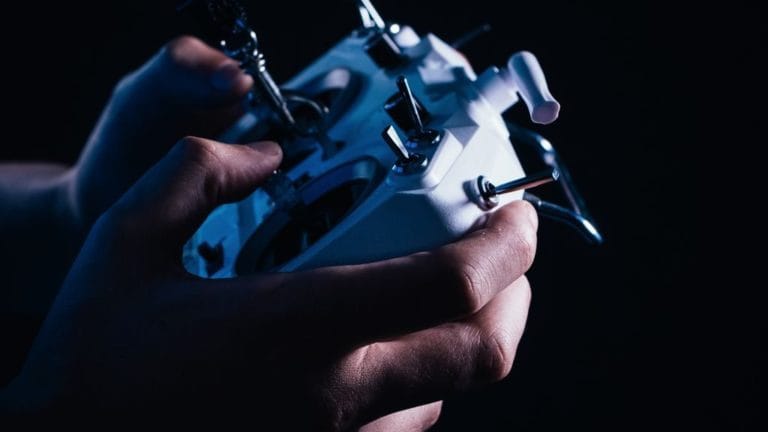
Radio System
Finally, you should look at the radio system which consists of your radio transmitter or remote controller and radio receiver.
The main dependency is the protocol used by the radio. Both radio transmitter and receiver should use the same protocol, and as mentioned earlier, that protocol should be supported by your FC.
If this is going to be your first FPV drone and you have 0 experience in flying FPV, the radio transmitter then becomes the first thing to look into instead of the frame! Why is that so?
Well, all beginners should train themselves in FPV simulators using a radio transmitter, before buying or building an FPV drone. Hence, a radio transmitter is naturally the first thing to buy.
Choosing the Right Battery for Optimum Flight Time
Putting all the specs of the battery aside, your main focus should be getting your drone in the air long enough.
But how long is long? If you are building a racing drone, it should run for 2-3 minutes. If you are flying long range, you definitely need more than that.
You can use this calculator to estimate your flight time by inputting the required parameters. While it is not 100% accurate, it gives you a good reference point to start with.
If you can’t get the flight time that you need, revisit your choices of components. Look for more efficient motors that produce the same amount of thrust at a lower power consumption, battery that stores more current per weight, and lightweight alternatives of other components (check out this guide on how to increase your flight time).
Estimate the Thrust to Weight Ratio
Once you have shortlisted every component, you can start calculating the payload. That should include a rough estimation of screws, solder, and wires weight.
Putting the regulation aside, the main purpose of knowing the payload is to know if your motors can produce enough thrust to compete in races.
Compare the total thrust produced by all 4 motors (which you’ve obtained earlier) to the final payload. If you are building a racing drone, the total thrust produced should be at least 10 times the weight of the payload. The higher the ratio, the better. If you are using your drone for cinematic or any other functions than racing or freestyle, this ratio is not as important.
So what if the thrust to weight ratio for your racing build is way lesser than 10? Well, you will need to change some of the components to reduce the weight, or change the motors to get better thrust.
Similarly, you might need to sacrifice some features or quality to achieve the optimum thrust to payload ratio. It will take some time for you to trial and error before you decide the final shopping list. The key here is to balance the pros and cons.
Preparation of Tools and Materials
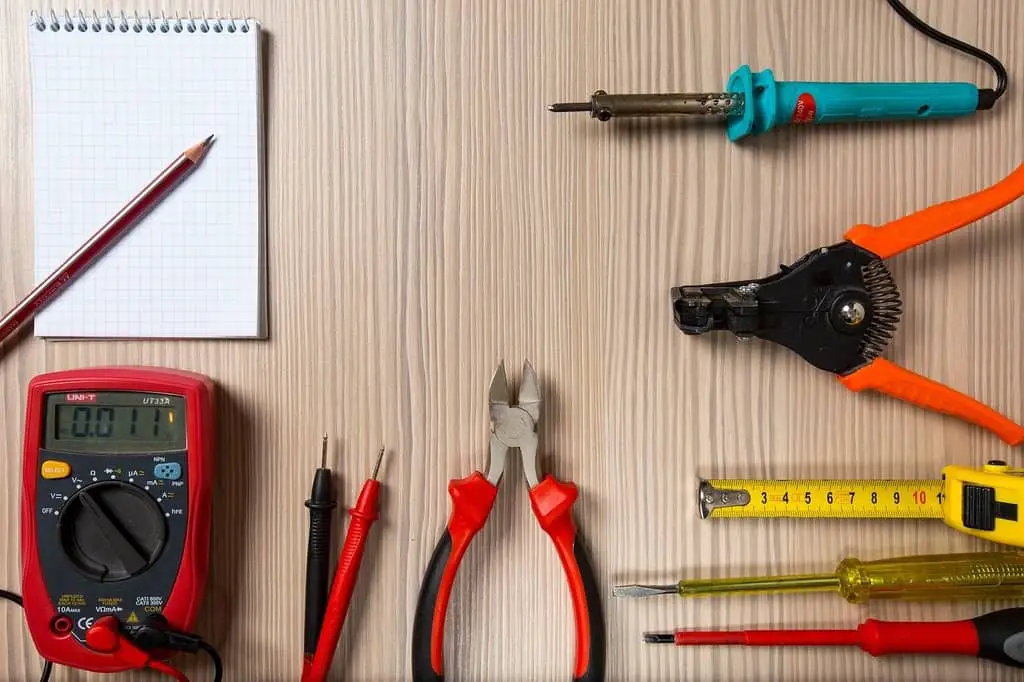
Apart from buying the components for your drone, you will need the following tools. I’ve included some affiliate links to those products.
- Soldering tools – solder iron, leaded solder (63/37), soldering flux, solder remover and a cheap tip cleaner
- Hex drivers or Allen wrench set (1.5 – 2.5 mm)
- Wire stripper
- Removable thread locker
- Battery connectors
- Low ESR capacitor (500-1000 µF; 35 – 50 V for 4S – 6S LiPo packs)
- Pinout diagrams of all your electronic components
- Multimeter
- Smoke Stopper
- Silicone conformal coat
- UV torchlight
- Heat gun (GetFPV | Banggood) or hair dryer
- Shrink wrap tube (GetFPV | Banggood)
Consider getting the Flywoo FPV Quad Tool Kit (with a multimeter) or NewBeeDrone tool kit (without multimeter) which already contain some of the important tools listed above.
Building the FPV Drone
Now that you have gotten everything with you, it’s time to start building your drone! Place all the components including motors, ESC, FC, VTX and etc. onto the frame. Arrange them in a manner where you are going to secure them later so that you can get a clear picture on how the wires run, what is the required wire length, and which one you should solder or install first.
Note that the sequence of steps below may or may not work for you, depending on how you stack your components as well as the design of the frame. As mentioned earlier, make sure you understand where you are going to place each component and arrange the installation sequence from there.
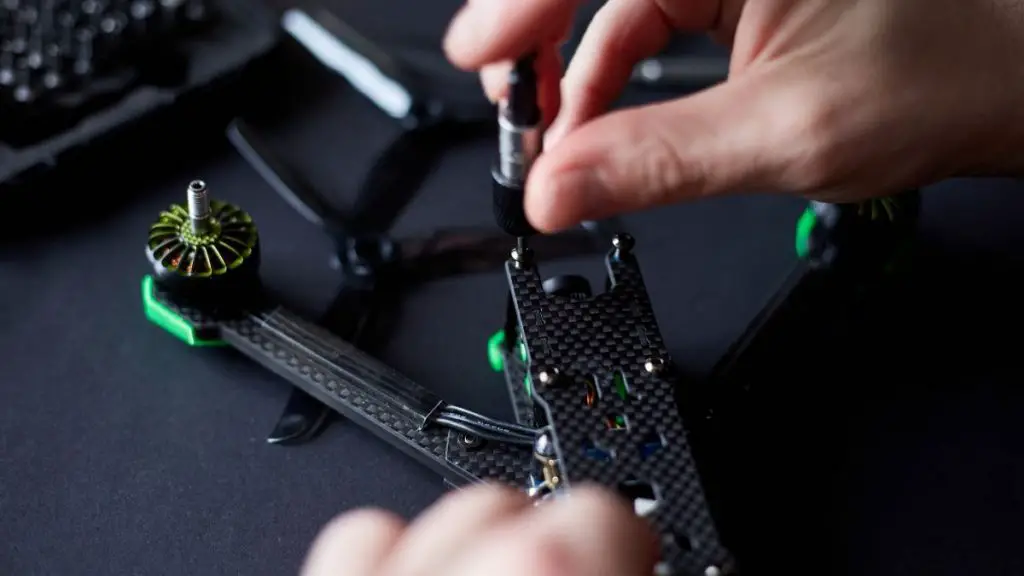
Assemble the Drone Frame
The drone frame is the first thing that you should work on. Assembling the frame is quite straightforward. Tighten the arms to the base plate if the frame is not unibody. The top plate would be the last thing to tighten up, after you have finished assembling everything else.
Be careful not to over-tighten the screws because that may wear out the threads on the screw or the frame itself.
The screws and nuts may loosen due to vibration from flight or crashes. If you want, you can use a removable thread locker to further secure the screws.
Mount the Motors
Now, take out your motors and place them on the arms of the frame. Make sure you mount the motors correctly if your motors have specific directions. The clockwise motors should be mounted on the front left and rear right arms. This is the default Betaflight motor spin direction.
Don’t worry if the motors don’t specify spinning directions. Most of the new motors can have their spinning directions adjusted in later.
Props Out vs Pros Out
The original motor spinning configuration is called the props in. In such configuration, both the front props spin towards the camera lens.
Some people prefers to use a reverse setting instead, where they let the motors on the front right and rear left arms spinning clockwise. This is also called “props out” because the props are spinning outward from the camera lens.
Props out configuration is recommended for 3″ or smaller drones because it significantly improve the aerodynamics, which gives you better flight performance. Such improvement is not as significant in a bigger drone.
Props out configuration lower the chance of your props getting caught by tree branches upon collision since the tree branch is now pushed off instead of pulled in. It also spins the debris and dirty away from the camera when flying. However, during turtle mode, it spins dirt towards your camera.
Decide the configuration that you prefer and install the motors accordingly. If you choose the props out configuration, you will need to change the set up your Betaflight. And you must remember this setup so that you install the props correctly later on.
Should You Soft Mount Motors?
Vibration from the motors can affect the performance of the FC gyro, which causes your drone to fly less smoothly. Some people may suggest you to soft mount your motors by adding electrical tapes between the motors and the frame. Allegedly, that can reduce vibration from the motors which would affect the FC.
However, there is no significant improvement from soft mounting your motors since the screws would still touch the other side of the frame.
Of course, you can add another layer of electrical tape on the underside of your frame, but the whole thing is just too troublesome and inefficient. Moreover, it gets more difficult to tighten the bolt and nuts with the electrical tape in between. The motor may come out mid-flight, which causes more damages to your drone.
To me, the risk of soft mounting outweighs the benefits (if there are benefits at all). Instead, you should soft mount your FC.
Installing the ESC
Put your 4-in1 ESC onto the frame and hold it using the screws. This will prevent the ESC from moving around when you are soldering.
Most of the ESC are numbered with 1-4 at their corners. Make sure the edge labeled with “1” is positioned towards the rear right arm, while the one labeled with “2” is facing the front right arm. This allows your drone to know which motor is on which arm. While you can configure it manually if you don’t want to follow the default position, it is an additional hassle for you. So, just follow the default position.
Measure and cut the wires of the motors if it is too long. Be careful not to cut them too short. Some people prefer to twist the 3 wires from the motor together so that it looks neater. Uncurling the wires gives you extra length in case you need that in the future.
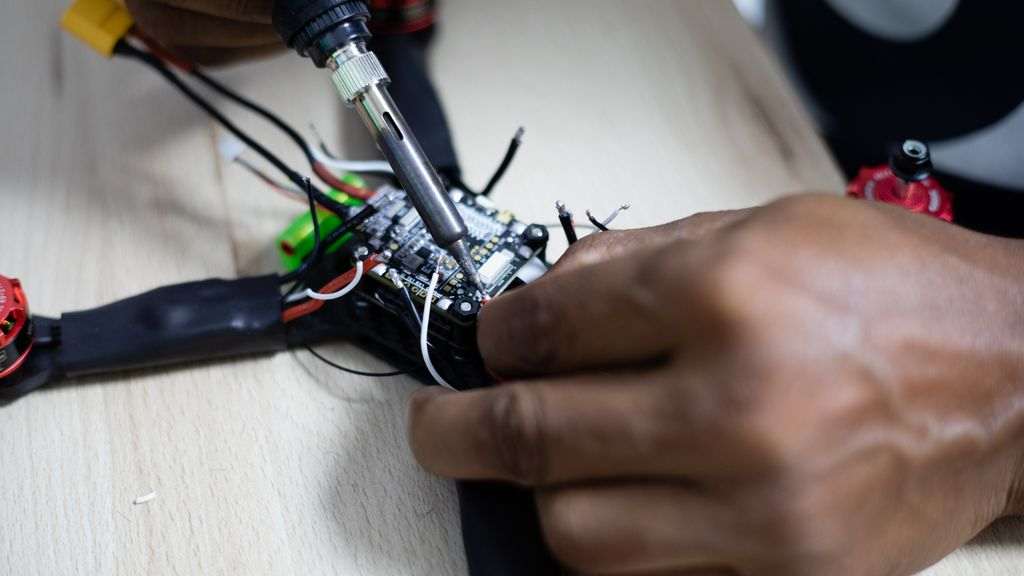
Solder all the wires from the motors onto the ESC. Each motor typically has 3 wires. You can solder any of the 3 wires to any of the 3 pads for each motor.
Next, get 2 battery wires. Solder 1 end of the wires onto the battery connector. Hold the positive wire and the positive leg of a capacitor together and solder both of them onto the positive battery pad on the ESC. Repeat the same for the negative side. Hold the capacitor with the battery wires using a cable tile or heat shrink so that it doesn’t move around.
The capacitor will help to reduce the voltage spikes generated when there is a sudden change of speed. Without the capacitor, you might fry your VTX or ESC. Most importantly, it helps to improve the quality of your video feed.
Mounting the FC
Pay attention to an arrow printed on the FC. For convenience, stack your FC on your ESC such that the arrow is pointing to the front of your drone. Of course, you can choose to mount it in a different direction. But you will need to let the system know which direction is the new front direction afterwards.
Connect both FC and ESC through the connector, which normally powers up the FC and transfer signals between the 2 components. Make sure you soft mount your FC by using the gummies to reduce vibration that can affect the gyro on your FC.
Mounting the FPV System
Place both the camera and VTX on the designated location on your frame. Loosely secure them with screws. Your camera should be tilted 15-20° upwards. Higher angle allows your drone to fly faster, but it is harder to keep your drone in the air if you slow down.
Solder/Plug the wires onto both camera and VTX and connect those wires to the corresponding pads on your FC. You can also connect your camera to the VTX instead of the FC. The video should go to the FC before passing to the VTX if you have OSD. Make sure you refer to the pinout diagram if you are unsure which wire goes where. Similarly, you can twist the wires to make them look neater and cut them into suitable length.
Remember to plug your antenna onto the VTX now, in case you forget about that later. If you power up your drone without an antenna on the VTX, the heat will build up in the VTX and eventually burn your VTX.
Consider using an antenna extension between your VTX and antenna. This will reduce the stress to the antenna connector on your VTX when the antenna got pulled in a crash.
If you are using a carbon frame, you also want to make sure that the VTX and antenna don’t ground on your frame. Carbon is conductive. If any live wire touches the carbon frame accidentally (especially after a crash), your VTX can burn due to overheat.
Connecting the Radio Receiver
One last crucial thing to connect is your radio receiver to your FC. Again, refer to the pinout diagram to connect the wires if you are not sure.
The antenna can later be tied onto the arm of the frame. Secure the antenna on the frame using a cable tie or heat shrink but make sure the tip of the antenna is outside the frame for better reception.
Other Peripherals
If you have other peripherals like buzzer, GPS, external black box or external OSD, you can proceed to connect them to your FC. Similar to the other components, find out where you intend to mount them, twist the wires together and cut it to the desired length before finally soldering them onto your FC.
Test the Build
Now that you have finished building your drone, it’s time to test if all components are connected correctly.
Continuity Test
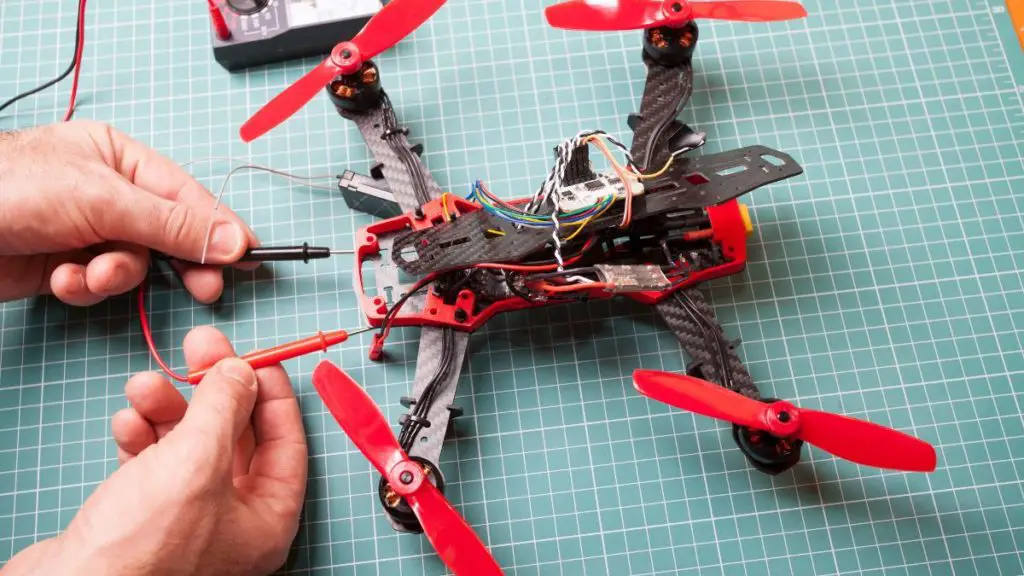
Continuity test is basically a test to check if there is any current flow. The main reason to do this is to find out any wiring issues that may burn your components.
Instead of taking the risk, you should really spend some money on a multimeter and some efforts to test the circuit. It is way cheaper than replacing your components if they get damaged due to faulty wiring.
Set your multimeter to continuity mode. Put the red probe into the positive prong (red wire) of the battery connector and the black probe to the negative prong (black wire). You should not hear beeping. If you hear 1 beep, you have installed your capacitor in the wrong direction. Resolder your capacitor.
If there are continuous beeps, things are not good. Find out where the contact point is and rectify it. There could be bridging at solder joints and you need to remove the bridge.
In the worst case, you might need to desolder the components one by one until there is no beeping in order to find out where it went wrong. Otherwise, if you connect your battery, it will get a short which can damage your battery or cause fire.
With 1 probe touching the negative prong of the battery connector, touch the ground pads of your FC with another probe. You should hear beeping from the multimeter. This indicates there is continuity between the battery connector and the ground pads, which is what you should expect. Conversely, there shouldn’t be continuity between any grounds and the positive prong.
Power Up the Drone for the First Time
After passing the continuity test, you can proceed to power up your drone. Before that, make sure your VTX is already connected to an antenna if you have not already done that! Without the antenna, the heat in your VTX has nowhere to escape and will fry your VTX. This is one of the most commonly forgotten steps when building an FPV drone.
Connect the smoke stopper to the battery connector on your drone. Then, connect your LiPo battery pack through the smoke stopper to power up your drone.
The smoke stopper shows you warning if there is a short. It allows you to quickly remove the battery if that happens, so that you can reduce damage to your drone. Again, you need to find out and rectify the issue which causes the short, if any.
Configuring Your FPV Drone
Setting Up Your Radio
The next thing to do is to bind your radio transmitter to your radio receiver so that they can talk to each other. Different models may have different binding methods so you will need to refer to the manufacturer’s instructions.
Check if there is any new firmware available for your radio. If there is, flash your radios (both transmitter and receiver) to the latest firmware so that you can enjoy the best features that your radio is going to offer.
If your radio transmitter supports failsafe, you can set it up now. Failsafe is basically a feature that kicks in when your drone disconnects from your radio due to whatever reasons. Instead of letting the drone fly away, most pilots set it such that the drone stops flying and falls to the ground.
Configuring the Flight Controller (Betaflight)
Your drone is not ready until you set up the FC. Depending on the firmware that you are using on your FC (eg. Betaflight, FlightOne or KISS), install the latest version of the respective software into your computer. For the purpose of this article, I am focusing on Betaflight, which you can download from here.
If you follow this guide from the beginning, you shouldn’t have installed the props yet. If you had installed the props, remove them before you proceed to avoid any accident or injury!
Obviously you need to connect your FC to your computer through the USB port and power up your FC. The first thing that you need to do is to flash the firmware of your FC to the latest version. Read your selection carefully so that you don’t flash the wrong firmware.
There are a lot of things that you can do in Betaflight to customize your drone. Here are a few important things that you need to configure in the Betaflight before your first flight:
- Check your radio receiver’s protocol setting and the radio channel mapping. Make sure they are correct. For instance, if you push the throttle on your radio, the FC should recognize it as a throttle and not other things else. If it is incorrect, rectify it on your Betaflight.
- Map all the switches or buttons on your radio transmitter to your auxiliary channels and associate them with different modes. This basically allows you to press the switches or buttons on your radio transmitter to command your drone. For instance, you can assign 1 switch to make your drone beep when pressed. The most basic function you need is arming. Some people may include beeper mode, turtle mode, angle/horizon/acro mode etc. Check out my list of useful Betaflight modes that you can configure.
- If you are flying only acro mode, disable your accelerometer so that you free up more processing power for your FC. If you are using an FC with F7 or H7 processor, this probably doesn’t matter though. F7 and H7 have more than enough processing power to handle the accelerometer and hence, any improvement from freeing up the accelerometer is insignificant. If you need to use your accelerometer, make sure you calibrate it in the Betaflight.
- Enable telemetry in the Betaflight if your radio supports telemetry. After enabling that, you can then set up the telemetry on your radio transmitter display panel.
- Enable the OSD and choose the parameters that you want to show on the FPV feed. Examples of information that can be shown include battery voltage, current drawn, flight time, signal strength (RSSI) and altitude.
- Setup VTX control if your VTX has Smart Audio/Tramp telemetry. This basically allows you to switch between predefined channels or power output remotely, either on your OSD or radio transmitter display panel.
- Configure the motor spin directions. The motors need to spin in the correct directions to fly. The front left and rear right motors should be spinning clockwise while the other 2 motors should spin counter clockwise, as depicted in the picture in Betaflight. Simply run the motors 1 by 1 and touch the spinning motor with a piece of paper to check the spin directions. If the spin directions are incorrect, change them using the BLHeli configurator (if your ESC uses BLHeli). Again, for safety reasons, please make sure all props are removed before doing this.
- Configure the board alignment if you didn’t mount the FC according to the arrow printed on it.
- Setup the failsafe in Betaflight. I know you have done so on the radio transmitter, but there is no harm having a double insurance in case the other fails.
- If you have other peripherals attached to your FC, you can set them up now.
Test the FailSafe

Before you go out and start flying, you have to test whether the failsafe is working as intended. With the props off, arm the drone and let the motors spin. Then, force turn off your radio transmitter. If you have set up the failsafe correctly, the motors should stop spinning.
Completing the Build
Check the FPV System
Power up your drone and FPV goggle. Make sure your FPV goggle and the VTX are connected with the antenna. If you have diversity on your VTX/VRX, position the antennas so that they are perpendicular to each other to get the best signal.
Change the VTX power output to 25 mW. Check if you can see the video feed clearly. If you have done the setup correctly, you should be able to see the video feed clearly. You should also see those parameters that you have set in your Betaflight OSD on the screen.
If the screen is blur, you might need to refocus the camera lens. You can refer to this guide on how to do that.
Try to toggle between channels and power output using your radio transmitter. You should be able to do that without issue since you have already set that up in the Betaflight.
Complete the Drone
At this stage, you are confident that everything has been done correctly and your drone is working well. Now, you can proceed to finish the build.
This is the best time for you to waterproof your drone. To do so, apply a thin layer of silicone conformal coating onto your electronic components. Avoid applying the coating onto any of the buttons. You can use an UV torchlight to check if the coating is applied thoroughly enough. For more details do refer to this guide.
Tighten up all the screws to secure all the components of your drone. Put in all the spacers and secure the top plate. Be careful not to over-tighten the screws to prevent wearing out the threads on the screw or the frame. Use the removable thread locker to further secure the screws.
Secure all the loose wires using heat shrink, cable tie or velcro to prevent them from running into and cut by the props, especially in a crash. I personally think heat shrink is the safest option, but it can be troublesome if you need to work with the wires in a race.
Because the props can bend in a crash, it might cut into your motor wires, or your ESC if it is mounted on the arm. To protect the motor wires and ESC on your drone arm, cover them with a piece of hard plastic (eg. PET bottle plastic) before shrink wrapping them.
Double check to make sure the antennas and antenna connectors would not get into the way of the props. Point them away from the props and tie them up if required. If you have 2 antennas, make them perpendicular to each other for better signal.
Many of the frames do not have a dedicated space for the battery. You can either place it on top or at the bottom of your drone and secure it using a battery strap.
Make sure the battery is secured enough so that the battery doesn’t detach from the drone upon crashes. It is easier to locate your drone after a crash if the battery is still connected. Make sure the cables (including the balance cable) don’t get into the way of the props by tying them with rubber bands.
Install the Propellers
Finally, you can install the props. Here is how to install the props on your drone.
First, you need to know which side of the props should face upward and which side should face downward. The upward-facing side of the props is usually labeled with the brand and specs of the props, while the bottom-facing side has no label.
After that, you need to check the direction of the props. Each of the blades on the props is slanted, where one side of the blade is higher than the other. The side of the blade nearer to the top of the prop is called the leading edge while the side nearer to the bottom of the prop is the trailing edge.

To produce upward thrust so that your drone can fly, the props should spin in a direction such that the leading edge cut the air first. The air then escapes through the trailing edge. From this, you can identify whether the prop is a clockwise or counter clockwise prop. Make sure you install the clockwise props on the motors that spin clockwise.
Test Flight
At last, you are ready to fly! Find a safe place with no obstacle and power up your drone. Keep yourself far from the drone for safety reasons. Arm your drone and slowly push the throttle. Your drone should take off and fly.
If your drone flip by itself from the ground when you push the throttle, you will need to either:
- Check the motors to make sure the spin direction is correct (refer to previous section on Configuring the Flight Controller).
- Check if the props are mounted on the correct motors. Ie. clockwise props should be mounted on clockwise motors (see the section Installing the Propellers).
- Check if you have mounted the FC in the correct direction. The FC has an arrow which points to the default front of the drone. It is okay if you mounted it wrongly. You just need to realign the direction of the FC using Betaflight.
- Reset your motor mix or PID if you have adjusted either of them before if the above don’t work.
FINAL THOUGHTS
After I started flying FPV drones, I told myself to settle with RTF/BNF because I am not a “technical” guy! While I am tempted to build my own unique FPV drone that is different from everyone, soldering was a show stopper for me. But at the end, I decided to take the leap of faith. I am glad that I did!
The skill necessary to build everything from scratch is tremendous and it requires dedication to understand every single component and how it works with each other. It was daunting to do, but it was never impossible in the first place. I hope this guide is useful for you and wish you the best in building your first customized FPV drone.
Lastly, be sure to fly legally and safely!